

Spicy Peppers In Breath Of The Wild
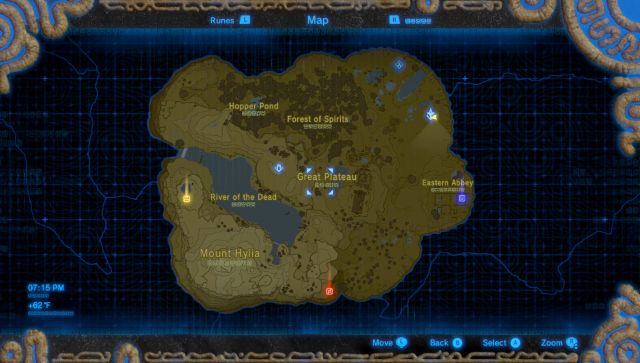
The Bully Plateau is the starting time region of the game where Link begins his quest. After awakening at the Shrine of Resurrection, Link ventures out into the Great Plateau and he must complete the first four Shrines to progress onward.
- Chapter ane – Great Plateau
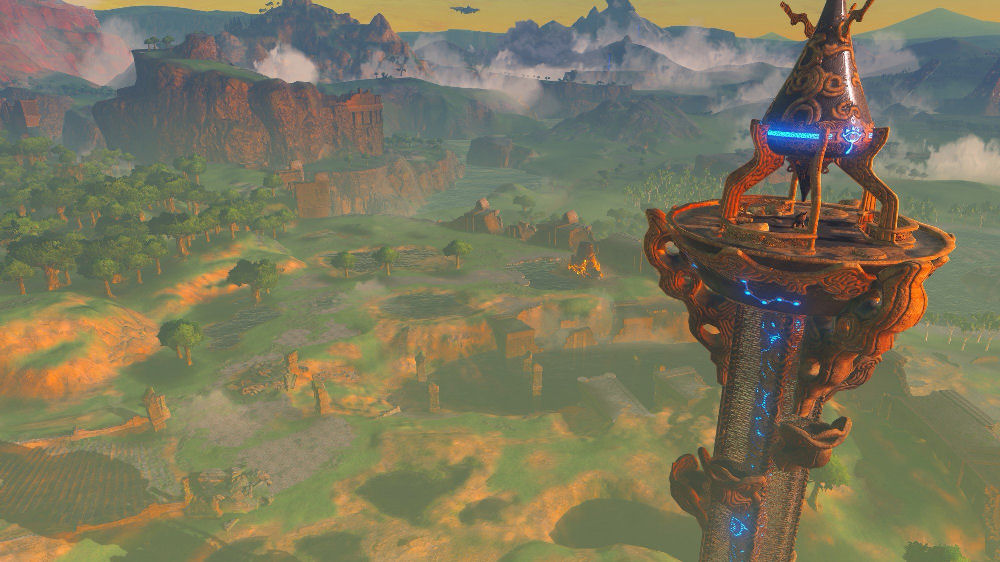
- 1.1 – Bully Plateau Tower
- 1.2 – Sultanate of oman Au Shrine
- 1.3 – Ja Baij Shrine
- 1.4 – Owa Daim Shrine
- 1.v – Keh Namut Shrine
- 1.6 – The Paraglider
- one.7 – Great Plateau Goodies
- Chapter ii – Dueling Peaks
- Chapter 3 – Hateno Hamlet
- Chapter 4 – Zora'due south Domain
- Chapter 5 – Vah Ruta Dungeon
- Chapter vi – Goron City
- Chapter vii – Vah Rudania Dungeon
- Chapter eight – Gerudo Town
- Chapter 9 – Vah Naboris Dungeon
- Affiliate 10 – Rito Village
- Affiliate 11 – Vah Medoh Dungeon
- Chapter 12 – Captured Memories
- Chapter thirteen – The Principal Sword
- Affiliate 14 – Hyrule Castle
- Chapter 15 – The Champions' Carol
1.1 Nifty Plateau Tower
The game begins with a voice summoning Link to awake in a desolate cave. Wearing nothing but a pair of shorts, Link will awake inside the Shrine of Resurrection. Wander over to the nearby pedestal to collect the Sheikah Slate, a mysterious tablet that will guide you along on your quest. This will trigger a nearby door to open up, so run on through.


Hither you lot volition find a pair of treasure chests containing an Old Shirt and some Well-Worn Trousers, giving our hero some much needed clothing. Run ahead and hold the Sheikah Slate up to the pedestal, causing the nearby door to open up up. Run ahead and climb up the rock wall to get outside, and you'll find yourself at the Great Plateau.

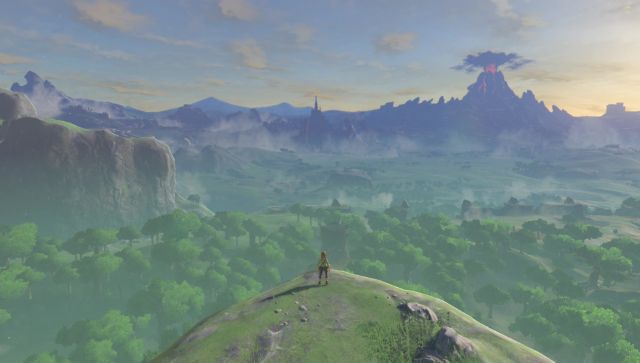
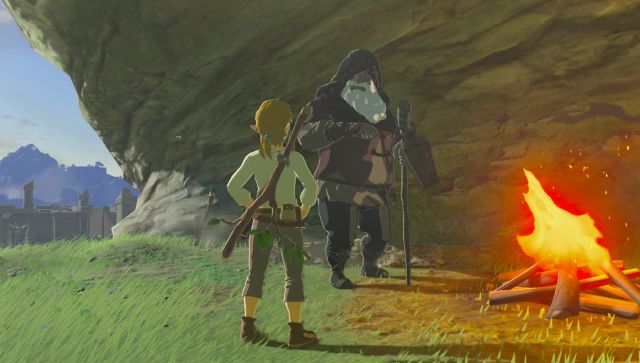
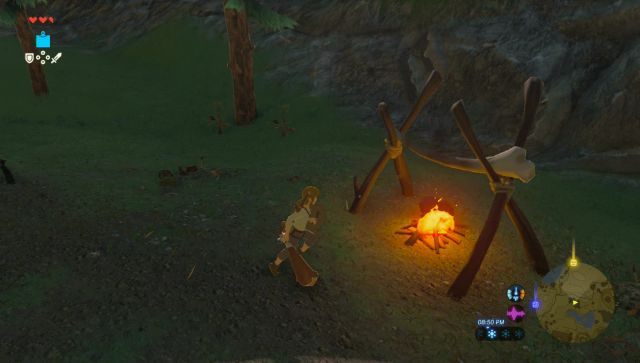
After an overview of the world, Link will meet an One-time Man in the distance walking towards a campsite fire. At this bespeak you can navigate the earth every bit you delight; you tin can find some Tree Branches, Hylian Shrooms, climb upward some rocks, collaborate with your environment, and just get used to your surroundings. Y'all don't even have to talk to the Old Man if you don't want to, and he'll react differently depending on whether y'all put on clothes all the same or if you have things without request. So begins the complete openness and freedom to do equally you please and encounter what happens which this game offers! This walkthrough will feature our recommended path to take, yet.
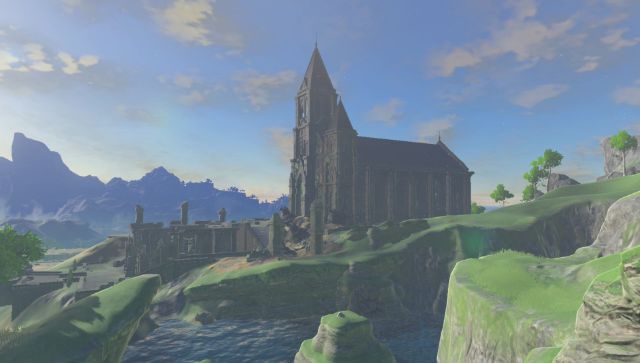
After the championship cutscene, make your way over and speak with the Old Man. He talks about the Not bad Plateau and how it is the birthplace of Hyrule. He gives you a glimpse of the nearby Temple in the altitude. If yous'd like to, yous can run over to these ruins to observe the Temple of Time, or keep and explore the world around yous. To the northeast of the entrance to the Temple you volition observe some ruins containing a breast. This contains a pair of Hylian Trousers, which have a defense of three, two more the previously obtained Well-Worn Trousers.
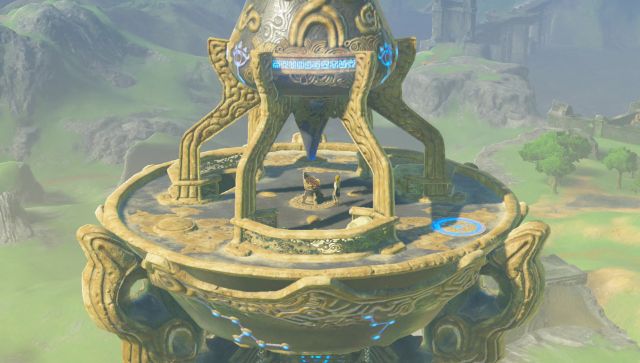
After a while the vocalism who woke you volition speak over again and volition highlight a spot on the map of your Sheikah Slate. Make your mode over to the location and you'll find various Bokoblins guarding the entry. You can boxing them or just run by if you'd like. Place the Sheikah Slate into the pedestal. This will activate the Sheikah Towers found all throughout the land, soaring them into the skies and giving Link a grander view of the region. Link will so appear atop the Great Plateau Tower.
Carefully drop down from the Great Plateau Tower and you volition one time once more be joined by the Onetime Man. He gives you the backstory of Cataclysm Ganon, who appeared 100 years agone and brought ruin and destruction to the land. The Old Human indicates that you are non able to leave the Plateau unless you have a Paraglider. He offers to trade y'all as long every bit you acquire a treasure from a secret Shrine that has appeared in the distance.


ane.two Oman Au Shrine
This is the first case where the main storyline tin exist "put on hold": At that place are a total of 4 shrines on the Great Plateau, and while the Old Man is pointing yous at the closest, all four will somewhen be required, and can be completed in any gild, so feel free to have the game how you delight. Nevertheless, the Oman Au Shrine is the closest, so we'll start there. There are a number of means to navigate towards the Shrine, but it is a adequately rubber route no matter which path you lot choose.
Shrines serve two master functions. Simply arriving at the shrine and putting the Sheikah Slate on the pedestal will unlock the shrine as a quick-warp location, which tin be traveled to at any time (even when within a shrine). The secondary function is to enter the shrine and complete it. If you save the shrine for later, the inner portion of the icon will show as red on the map. When all treasure chests within the shrine are collected, a treasure chest icon will show adjacent to its name on the map when it is selected. And finally, shrines that are non unlocked will show as red in the earth, shrines that are unlocked but not completed will show as blue with a crimson top, and completed shrines show as blueish.
DLC NOTE: You may detect a purple treasure chest labelled 'EX' adjacent to the shrine. Open up this upward to obtain a Ruby-red.
With everything set, go alee and enter the Oman Au Shrine.

Hither you will find the Magnesis Trial. Run over to the pedestal and insert the Sheikah Slate to get the Magnesis Rune. This allows Link to interact with and move virtually metallic objects from a distance. When using the Magnesis Rune, targets made of metal will be highlighted to assist find them. Use Magnesis to lift one or both of the two large metallic plates that are on the ground here, revealing a pathway. Drib down below and climb out of the water if you've fallen into information technology. Run alee and climb the steps.


Here you will notice a large wall and looking at it, one of the blocks is dissimilar than the remainder and is made of metal. Another metal block is also in the corner. The residue of the blocks can easily be maneuvered past pushing confronting them with a metal block using Magnesis. Movement the blocks out of the fashion, or create a staircase over them, and continue.


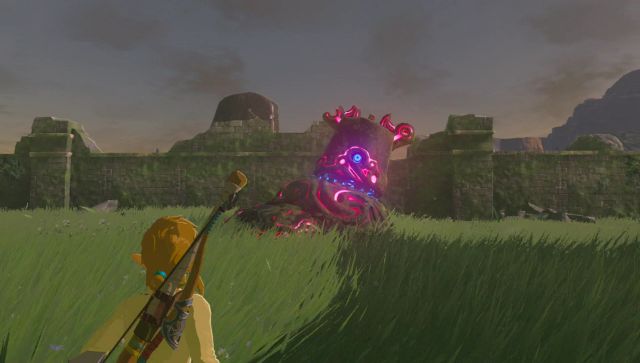
Picket out for the small Guardian Watch I that is roaming around. Guardian enemies do increased damage to whatsoever weapon or shield used against them, including bows. You can just run over and slash abroad to defeat it, property up your shield to block its laser beams. Alternatively, you can use Magnesis to command the cake and push button the enemy downwardly into the water, or even use the large cake to smash the guardian.
There is i play tricks to finish off guardians of any type easily, though it requires heavy do. If you stand in one spot long plenty it will aim its focus and shoot a beam at you. The use of the Perfect Guard maneuver can reflect the axle back at it, simply if this is not correctly timed, it will do considerable damage to your shield and stronger guardians will likely destroy weaker shields. To use the Perfect Guard Maneuver, focus the target with a shield in mitt, and press A to swing your shield. If correctly timed, this volition reflect attacks back at the assailant and can as well create openings when fighting other enemies. This move is not vital at the start of the game, merely apace becomes and so. It is best to practice as much as possible and master it rapidly.
There is a metal plate on the ground here and it serves as a span to the next platform. Run across and and so use Magnesis to carry the metal plate over, using information technology as a span to get further beyond.


If you turn to the left you can run into a treasure breast on a college platform. Use Magnesis to grab the treasure chest and pull it towards y'all. Open it upwards to become a Traveler'due south Bow. Up ahead at that place are two massive metallic doors. Use Magnesis to pull the doors open, allowing you to laissez passer.


Run ahead and examine the altar to speak with the Monk, Oman Au. He is the Monk of this Shrine and as a reward for your completing his trial, he will give you a Spirit Orb. A Monk will be found at the stop of every shrine.


Y'all will then be warped back to outside of the Shrine. At this bespeak, now that yous have the Magnesis Rune, you tin can interact with all sorts of objects in the Overworld. You tin command large boxes and toss them into the air, which upon destruction volition requite rewards. You tin besides pull up metallic treasure chests from underwater to uncover some more goodies. Some treasure chests, particularly in grassy areas, may exist half buried, and can exist pulled upwardly with this rune. As always, the key here is explore, explore, explore!
i.3 Ja Baij Shrine
Once you consummate the get-go Shrine, the Old Man volition paraglide over. He informs you that you lot can warp over to previous locations that you've uncovered with the Sheikah Slate, including the Great Plateau Tower, as well as Shrines. He tells you to meet him support at the top of the tower, so pull out your Sheikah Slate and warp on over.
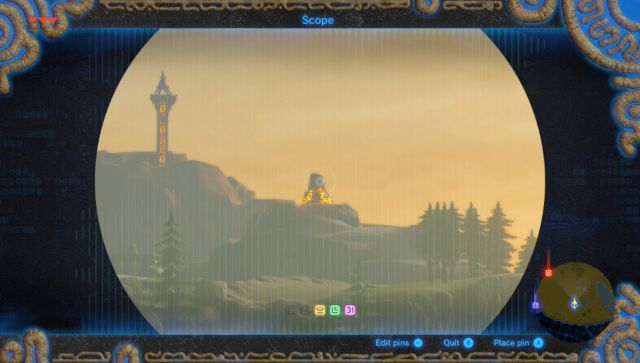
The Old Human being is already here. Odd? Talk to him and he'll teach you lot about the scope ability of your Sheikah Slate. He suggests looking out into the distance so that you can pinpoint the location of the other three shrines in the area. All three of them are easily visible from the Bang-up Plateau Tower, but they tin besides be easy to miss. Note that the telescopic does not take a zoom in or out function so frequently information technology'southward better to use the normal camera for looking effectually and the scope specifically when you desire to place a pivot.
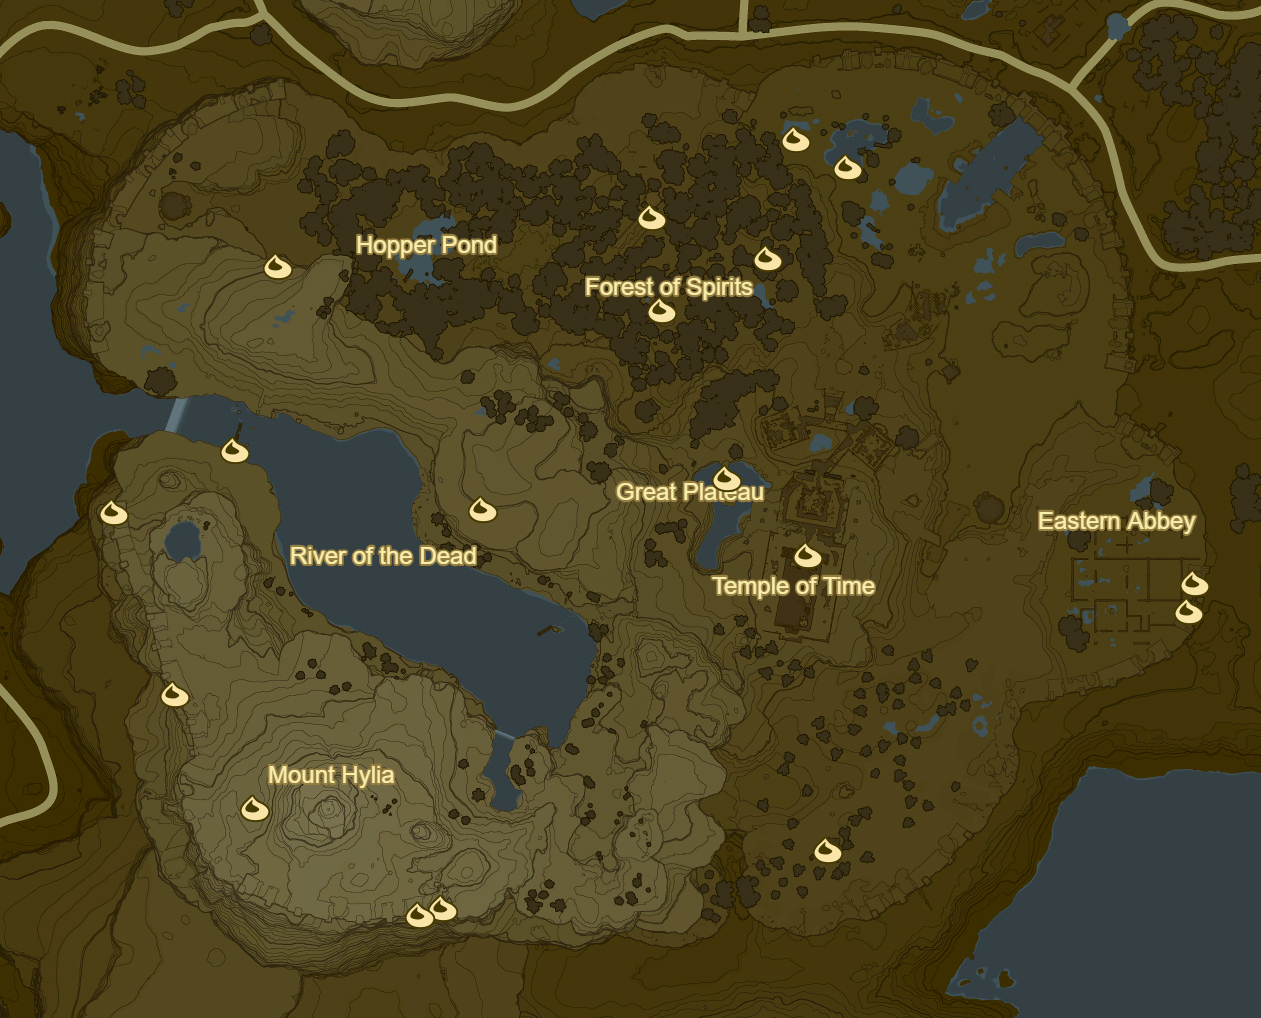
Pins will automatically clear themselves when you reach them, and show up on your minimap to make them easy to orient towards, even at long distances. Glance around until you see the three remaining Shrines and be sure to pin them with your scope, and so that it is easy to caput towards them later. While it can be easy to lose your sense of direction, i of the shrines is at the east surface area of the map in the Eastern Abbey section. Some other is at the south-fundamental role of the map, just eastward of Mount Hylia, and another is at the far west of the map, just west of the River of the Expressionless.


The closest of the shrines is nearby at the east end of the Dandy Plateau. It is located in a bit of a maze surface area that is surrounded by a couple of inactive Guardians. However, as yous draw near, these Guardians will awaken and will shoot a massive beam of free energy towards you lot after locking on. The path to the shrine is blocked off by a large boulder. The easiest way to access the shrine is to simply climb over the wall, though this tin be tough if a Guardian has locked on to yous. Alternatively, you can utilise the Guardian's beam to blast through the bedrock, but that is much more difficult.
DLC Note: You will be able to notice another purple breast on the wall just outside the shrine. Open information technology up to snag a Nintendo Switch Shirt.
Once beyond the wall, place the Sheikah Stone into the pedestal to open the entrance to the next Shrine.

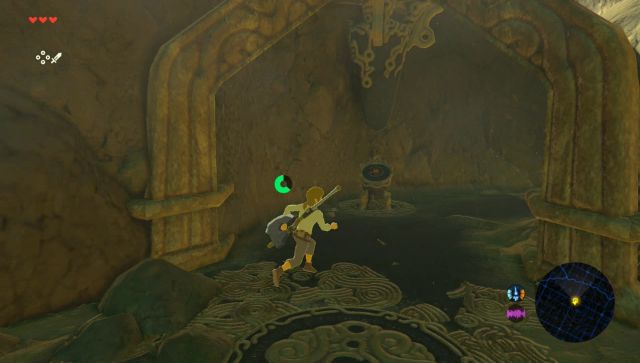
Here we are at Ja Baij Shrine, too known every bit the Bomb Trial. Run over and identify the Sheikah Stone into the pedestal and you'll acquire the Remote Bomb Rune. This will permit Link to use Remote Bombs, in both the spherical form we all know and honey, as well equally a new cubic grade. The difference between the 2 bombs is that spherical bombs will of form roll, and cubic bombs don't. Use cubic bombs when y'all want to make certain the flop doesn't move out of place, for instance. Other than that there is no difference between either flop. And for a final bonus, these bombs do not have a timed fuse like in previous games. Instead, they simply explode when they are triggered remotely, by the rune. As these bombs are magical, they are space in supply, even so a short cooldown is required betwixt each utilize.
Equally an advanced technique, it is possible to get a bomb out, switch to another rune, and then later switch back to the bomb rune and detonate information technology then. Since there are two bomb runes, this ways you can have i of each out at a time, detonating i or the other every bit needed, by switching betwixt the two Runes in the Sheikah Slate.
In the start room there are a pair of boulders that can be blown up using your new rune. Take the path to the right and blow up some more boulders to find a treasure chest that contains a Traveler's Claymore.


Blow up up the boulders that were on the left and climb the ladder to progress onward to the next room. Here yous volition find a moving platform and there are some more large boulders that are blocking your path. You want to use a cube bomb here so that it won't roll off the moving platform. Place the flop at the edge of the moving platform and so render to a safe distance. When the platform moves next to the boulders, blow it upwards to become by.


In the next area, you volition see some devices that shoot out in a management. The starting time ane y'all meet on the right has a small tunnel where you can drop a spherical bomb into. The flop will launch across the room and you tin detonate the flop to boom away some blocks.


Before progressing, head to the other side of the room where there are a pair of these launching devices. You tin accept ane of them launch you to the other side to reach another treasure chest that contains a piece of Bister.


Now drop downwards to the basis floor and make your style over to the ladder. With the boulders above at present out of the way, climb on up and make your way over to the Monk. But like the Monk from the previous Shrine, he volition bestow upon yous a Spirit Orb and return you to the surface.
With the Bomb Rune, some other flood of possibilities is open to you lot in your exploration. Y'all can at present wander around the Great Plateau, using your Remote Bombs in various ways to find a wide variety of goodies.
1.four Owa Daim Shrine
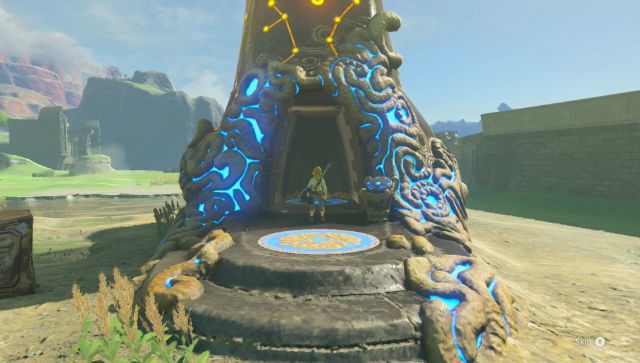
The Owa Daim Shrine is located at the south-central portion of the Great Plateau, at the south-eastern edge of the Mount Hylia region of the map, and is our adjacent destination. This shrine, along with the concluding shrine in this area, are both located near colder climates, and Link will begin to take damage if he doesn't have the proper gear or food. In our walkthrough we will first head towards the Temple of Time virtually the center of the map and become what we need to resist the cold, in guild to make information technology easier to get to the fourth shrine, later.
(Note that the Owa Daim Shrine tin be reached directly via other methods, such as cutting downward a tree to fall across a chasm, as 1 instance, and cold resistance is not required. At that place are various ways to get cold resistance for the fourth shrine along that route, besides. But this walkthrough couldn't perchance cover all the options you have in forepart of yous! So equally ever, feel costless to explore and find your own way whenever you lot please!)
From the Temple of Fourth dimension head westward and yous will run into an archway that leads to a snowy plain. Just side by side to the archway there are some Spicy Peppers, so be sure to grab them. Before heading into the snow, walk northward a bit and y'all'll run across a Bokoblin military camp. It's a skillful idea to go rid of these enemies so that y'all can do some cooking. There are more spicy peppers in this area and it is recommended to pick them up too. Use a Boko Club or a Tree Co-operative and lite information technology on burn down, and and then use that flame to light up the fire beneath the pot.


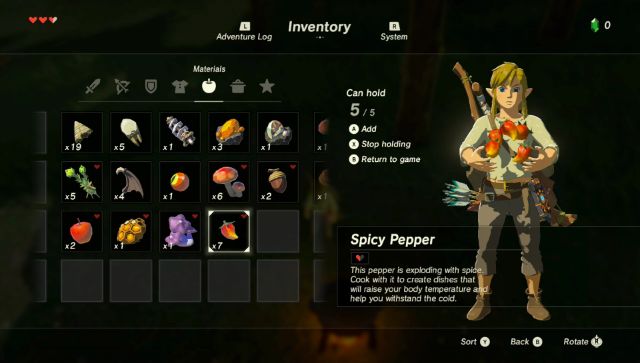
Go into your inventory and select those Spicy Peppers you lot but obtained. You can hold upwardly to 5 of them at a time and if you throw them all into the pot you tin can cook upwards some Spicy Sautéed Peppers. Five of them will let you lot to have low-level cold resistance for over 12 minutes, which should requite you plenty of fourth dimension to navigate through the higher elevation regions of the Bang-up Plateau. You lot can likewise experiment and create other recipes too by mixing and matching ingredients, however if y'all include at to the lowest degree one Spicy Pepper, your result is likely to still give some amount of cold resistance. Cooking is pretty self explanatory; reading the description of each cooking textile will give you a pretty accurate idea of what the results volition be for combining diverse items (or multiple of the same detail, such every bit with Spicy Sautéed Peppers.)
There are other ways to survive the cold, too! If in your travels y'all have come across a Warm Doublet (an selection for how to get this item is afterward in this chapter), that will also provide cold resistance when worn. You can also carry a lit torch, although it is easy to accidentally put information technology away or break it when fighting, and and then information technology may not exist easy to light it over again. Another option is to collect a lot of food and then continuously eat it all as you take impairment from the cold while apace traveling to your destination. This cannot be said enough, only there are many means to accomplish objectives in this game, so feel gratuitous to come upwards with your own!
For this guide though, cook and swallow some nutrient to get cold resistance, and and so run through the gate to reach the colder area. It'southward at present fourth dimension to make your mode over to the Owa Daim Shrine. Past coming from this management, you can climb higher up and then strategically climb down right when you lot are almost the shrine. Exist sure to bank check our Interactive Map if you lot aren't certain of the exact location of the shrine. As per usual, in one case you go far use the Sheikah Slate on the pedestal to open upward the entrance.
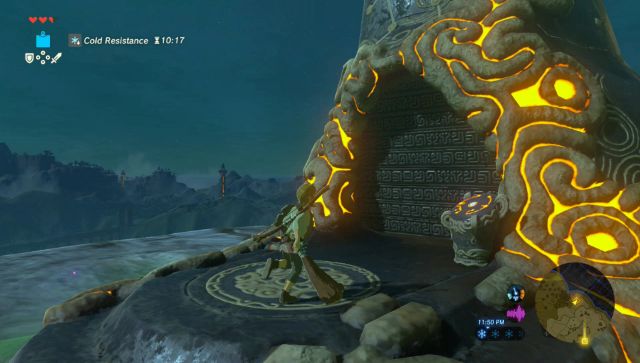
Inside, run over to the Pedestal and place your Sheikah Slate to go the Rune for this shrine. This will requite you the Stasis ability, which allows Link to freeze objects in time for a short period. These objects can also be striking to store kinetic energy and when fourth dimension resumes, this free energy will be expelled all at once, which can cause fifty-fifty the largest of objects to go launched beyond a room.
The massive gear on the left side of the room is causing the nearby platform to rotate. Expect until the platform is level and then use Stasis on the gear, freezing it in time momentarily. Quickly run across earlier the gear re-activates.


Run ahead and y'all'll run across a massive ball rolling downwards a narrow bridge. In one case the ball passes you, quickly sew the bridge. Look alee and you'll see a second ball ready to roll down. Use Stasis to freeze information technology momentarily and apace run upward the bridge and off to the side to avoid the brawl.
Before progressing further, there is withal a treasure for us to notice here. Await until the ball rolls by and and then quickly run up to the top of the ramp where the assurance first announced. Here you volition notice a treasure breast containing a Traveler's Shield.


Run ahead and you'll come across a large Fe Sledgehammer sitting against the wall. Exist sure to pick it upward equally we'll need a heavy duty weapon. Up ahead the path is blocked off past a stationary ball in the middle of the ramp. Use Stasis to freeze the object. In the few moments earlier it re-activates, use the Iron Sledgehammer to hit the ball several times. This will shop the free energy and once time resumes, the ball volition exist launched ahead.


At this point you tin run ahead to achieve the Monk. Similar the previous ones, he will give you a Spirit Orb for completing the trial.
Dorsum in the Overworld, the Stasis ability can be used on a multifariousness of objects. It's fun to employ information technology on the nearby rock and launch information technology all the way across the map, for instance, and be rewarded with the chest underneath. Again the possibilities for exploration have opened up even further to yous. Feel free to get sidetracked every bit much as you lot like (that's what this whole game is nigh after all), and when you're ready, we'll motion on to the side by side Shrine.
1.v Keh Namut Shrine
The Keh Namut Shrine is located at the west portion of the Neat Plateau, just to the west of the River of the Expressionless and northwest of Mount Hylia. The Shrine is located at one of the local peaks of the mountain in this area, just near a small lake. The expanse around the Shrine is cold, so once once more, be sure to go common cold resistance in some way, such as cooking upward some Spicy Sautéed Peppers. The River of the Dead is the biggest obstacle on the path to attain this shrine. All routes beyond the river are a tad bit hard, so your all-time bet is to simply go around the south edge. Merely in one case more, feel free to find your own fashion, and go along this walkthrough once you reach the shrine however you lot like!
If you lot are coming from the Owa Daim Shrine, immediately just climb the westward wall to get to a much college peak and it's a pretty straight frontward route from hither. Otherwise, make your way to the Temple of Time almost the heart of the Great Plateau and travel westward through the archway. Travel around the south cease of the River of the Dead and begin to scale the mountain.
Before heading to Keh Namut Shrine, make your fashion up to the top of Mountain Hylia. At the summit of the mountain yous volition find the Former Man. He is impressed that you were able to arrive this far and he'll give y'all the Warm Doublet, which is an upgraded tunic that is resistant to the colder surround that we mentioned earlier. Be sure to likewise examine the nearby rock to get some Bister. Now make your way over to the Keh Namut Shrine.
(Annotation, this method of getting the Warm Doublet is simply available during this affiliate. Other methods are besides available, for explorers intrepid enough to notice them. After this chapter however, you tin can visit the log cabin south of the Owa Daim Shrine to get the Warm Doublet from a chest, or buy it from a store elsewhere in the world.)
DLC Note: In that location is ane more imperial chest to find. The Keh Namut Shrine is located at the elevation of a summit, and at the base of that peak you'll find some collapsed walls on the west side of the plateau. At the top of 1 of these walls is a breast containing some Bomb Arrows.


You will go far at the Keh Namut Shrine, otherwise known as the Cryonis Trial. Run on over to the pedestal and identify your Sheikah Slate to get information technology infused with the Cryonis Rune. This volition give Link the Cryonis ability, which allows Link to build ice pillars. In that location is a modest pond of water and if you utilise Cryonis, yous can create a pillar of ice. Climb upwards the ice and onto the adjacent platform.


Run alee and y'all'll find a gate that is but to a higher place a swimming of water. Utilise Cryonis to create an ice pillar correct underneath the gate, and the pillar will cause the gate to rise up, assuasive you to pass. This is an ability of Cryonis that oft gets forgotten, then make certain to retrieve it when you're trying to figure out puzzles!


You lot'll then meet another Guardian Sentry I. Since in that location is water hither, a new gainsay selection is to use Cryonis to create an ice pillar, preventing its axle from striking you. Run on over and defeat the enemy. Just to the side there is a pocket-size nook that contains a treasure chest. Uses Cryonis to create a pillar and climb up to reach the treasure chest property a Traveler'south Spear.


At the end of this path, you'll observe a platform that is lying on the ground. Just beneath it on the right, use Cryonis to create a pillar, causing the platform to plough into a ramp and allow you to climb up it.


Run over to the finish of the Shrine where you volition detect the Monk. Simply as the previous Monks, Keh Numut will requite you a Spirit Orb for completing the trial.
Once you exit the Shrine, y'all can get a nearby treasure chest that was surrounded by water by using Cryonis to reach information technology. Once more, your ability to explore has been increased. Cryonis is neat for crossing any torso of water, including ones that may be too far or have too strong a current to swim. You tin can use the ability wherever you come across water and it will permit y'all to reach an assortment of new areas.
i.6 The Paraglider
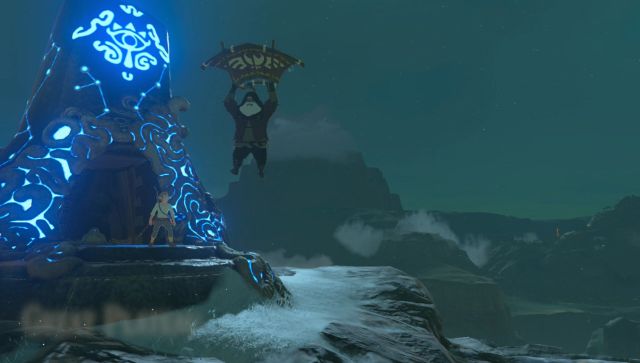
Once y'all complete all four shrines, the Old Human being will one time once again appear. He tells you that you should imagine an X on your map, with the four shrines every bit the terminate points. Find the spot where those lines intersect. That location would be the Temple of Fourth dimension, located right near the heart of the Great Plateau. You tin warp over to the Shrine of Resurrection, or but make your mode downward the mountain. This will complete the Isolated Plateau objective.
One time you arrive at the Temple of Fourth dimension, run inside and you will meet a shining Goddess Statue. Whenever you take four or more Spirit Orbs, you can find a Goddess Statue and pray to it. Equally a trade for four Spirit Orbs, you can upgrade your Stamina Vessel, or yous can go a Middle Container. Either one is a good option at this point.


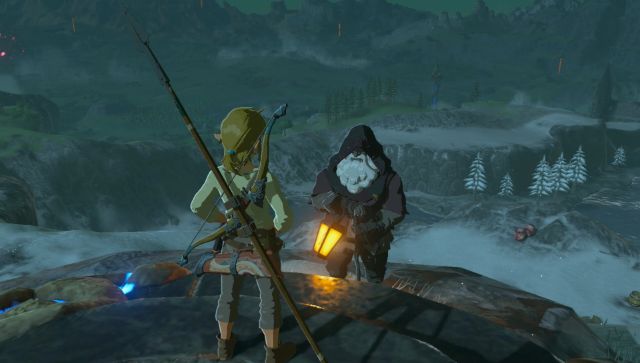
After communicating with the statue, the Quondam Human being will call out from atop the Temple of Time. Go outside and climb up to the top of the Temple. 1 method is to go to the front of the temple, and then from outside, confront it, and then climb the corner on your left. Run over and speak with the Old Human, who volition reveal a fleck more than most what the heck is going on in the world. He will then finally give Link the Paraglider, allowing you to finally exit the Great Plateau.
Afterward the cut-scene, 2 new Chief Quests open up upwardly in your Adventure Log. The get-go ane is Destroy Ganon, which is the last thing that you volition demand to do in the chief quest. Technically, you tin can venture direct to Hyrule Castle now and take on the terminal dominate. However, we are far from prepared to exercise so, but the game does give y'all this pick. The other Master Quest is to Seek Out Impa, and that is where nosotros will go in the next chapter.
Also notation, amiibo are now free to use. The choice to use them will demand to be turned on in the settings menu. You will need to switch to the amiibo 'rune', aim at an acceptable identify on the basis, and then tap the amiibo to use it. All amiibos that exist will grant some kind of advantage and can be used once per real life day, each, although only amiibo related to the Zelda franchise give the exclusive rewards. The exception is the Wolf Link amiibo; if he dies he may not be summoned once more for some other day, but otherwise he can be summoned equally many times as you like. For more information, see the Breath of the Wild Amiibo wiki page.


1.vii Great Plateau Goodies
This section will embrace all the optional content we tin currently complete on the Plateau, so if you are satisfied and want to continue with the chief quest, head on over to Chapter two.
Optional: Korok Seeds
From the start of your playthrough you may have stumbled upon unusual puzzles which, when completed, cause a Korok to announced, gifting upon you lot a Korok Seed. There are 900 of these to be found in the overworld, each requiring a simple puzzle to be solved. This walkthrough volition highlight all 900 seeds, with various methods available, depending on your playstyle.
For the 18 seeds located in the Swell Plateau Tower region, we accept three options:
Optional: Stone Talus
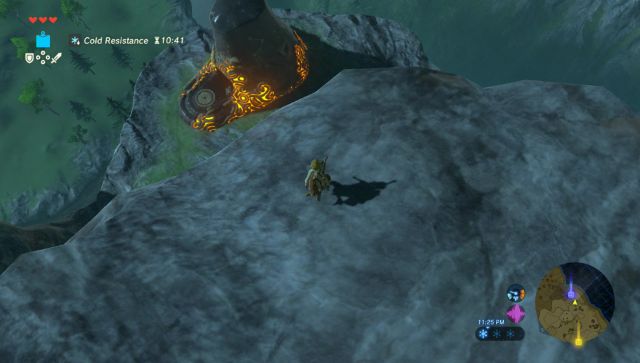
At that place's ane final thing to do on the Plateau before we leave; defeating the showtime overworld boss – the Stone Talus. These stone titans appear all over Hyrule and come in many forms, though this 1 is a bones Talus. It can be constitute in the large clearing of the Forest of Spirits (see exact location hither) as a pile of rocks. As you approach information technology, the Talus will construct itself and a health bar volition appear at the top of the screen.


Exposed on the peak of the Rock Talus is an black ore eolith, which is the simply place the boss can be damaged. The Stone Talus is otherwise unaffected when attacked, except by Remote Bombs, which can exist used to destroy its arms. This does non deal any damage, however, so you must attack the ore deposit to defeat it. The basic strategy here is to toss a bomb in its direction, run dorsum, and then detonate the flop to crusade the Talus to drop to the basis. At this signal, run back to the boss and you should exist able to climb on top of it. The Stone Talus will stand support, and you will have a clear view of the ore deposit, so slash away. The best weapon to utilize here is the Iron Sledgehammer, if yous still have it, as it deals significantly more damage than other weapons to the Talus. Later a brusque while, the boss will grab on to what you are doing and throw you lot off. Only echo the process until you defeat the Talus.
Equally a reward for your hard work, the Talus volition leave behind many gemstones, such equally Amber and Opal, in addition to Flintstone. These items can be sold for loftier prices, though will come in handy as materials afterward on, so information technology may be wise to hang on to a few.
This Talus is i of 40 institute all over Hyrule, and in order to accomplish 100% completion, you must defeat all twoscore at least one time. The locations of each of them will be shown in the capacity to come.

Spicy Peppers In Breath Of The Wild,
Source: https://www.zeldadungeon.net/breath-of-the-wild-walkthrough/great-plateau/
Posted by: haynesemanded.blogspot.com
0 Response to "Spicy Peppers In Breath Of The Wild"
Post a Comment